Retouch Basics for Graphic Designers and Photographers

Tutorial Resources
- Portrait for retouch – freeimages.com
Step 1

Step 2
Now you’ll be working on duplicated layer. Choose Clone Stamp Tool. Use soft brush. Hold alt and pick cleaner fragments of skin. Then use stamp tool under her eyes, erase freckles and wrinkles. (Feel like plastic surgeon.) You should play with brush size.

Step 3
Go to her forehead. Also with clone stamp tool erase hair strands and wrinkles. Use smaller brush.

Step 4
Duplicate layer when clone tool was used. From top menu choose Blur > Gaussian blur.

Step 5
Add mask to this layer. Mask everything, but except face and neck. Mask eyes, hair, lips and nose. Facial features will be more detailed, than skin.

Step 6
Decrease opacity of this layer to 70%.

Step 7
Now her face is dolly-like. Add new layer. From top menu choose Filter > Noise > Add noise.
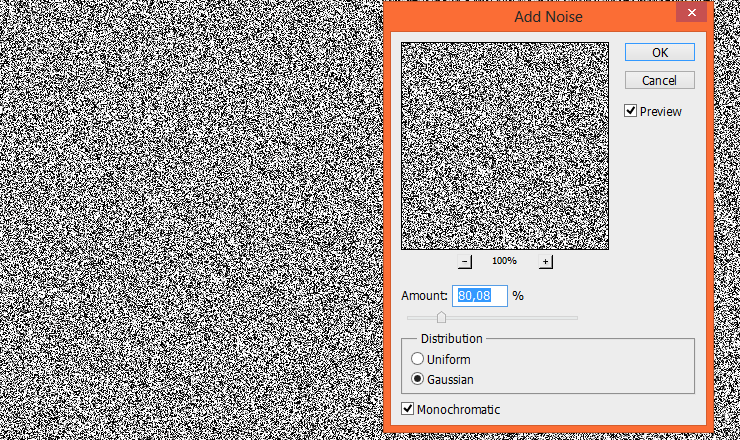
Step 8
Add mask to this layer. Fill it with black.

Step 9
Back to layer with blur. Hold alt and click on mask.

Select all (ctrl + A), then copy (ctrl + c) selected area.
Step 10
Go to noise layer. With alt holding click mask and paste copied mask (Ctrl + V).

Step 11
Decrease opacity of this layer to 3%. Then change blending mode to overlay. Skin will be look like real.

Step 12
Add new layer. Pick Big, soft brush and use #d0b3a6 color. Draw some strokes on her face – where skin isn’t perfect.

Step 13
If it’s needed, choose from top menu Filter > Blur > Gaussian blur.

Step 14
Change blending mode of this layer to Soft light. It will make skin lighter.

Step 15
Back to grain layer Duplicate it.

Step 16
Place layer on the top. Change blending mode to Divide, change opacity to 8%.

Step 17
Add adjustment layer – Brightness/Contrast. Set it as shown.

Step 18
Cool! Now fill mask with black. Then, with soft, big brush draw some strokes on her skin.

Step 19
It’s time to add make-up. I think her blonde hair would be suit to blue eyeshadow. Add new layer. Pick soft brush and decrease opacity of it to 50%. Draw gently eyeshadows.

Step 20
Change blending mode of this layer to Hue. Decrease opacity to 53%. It will be base for eyeshadows.

Step 21
Create new layer. With the same brush settings and color, draw on the edges of an eye.

Step 22
Now change blending mode of this layer to Hue. Again. :).

Step 23
For the smoky eyes effect, draw some shadows on the top of an eye. Use the same brush settings as in step 19.

Change this layer blending mode to Multiply.

Step 24
Add new layer. Change its blending mode to Multiply. Set smaller brush and draw edge of the eyelid (the same settings as in step 19, but size is 1-2px).

Step 25
If is needed, you can decrease opacity of created layer to 59%.

Step 26
Now you’ll make eye iris. Add new layer. With soft, big, blue (#115279) brush, fill eye iris.

Step 27
Change blending mode to Color Dodge – iris will be brighter and more saturated.

Step 28
To avoid flatty color of an eye, add new layer. use small, soft brush and dark-brown color. Draw edges of an iris.

Now you can change its blendnig mode to Overlay.

Step 29
Add new layer. With small, brown brush make lashes longer. Use pressure opacity of brush to more real look. Arrows will guide you, how to draw lashes strokes.

Step 30
Time to make a lips! Add new layer. Create rough fill of lips. Use soft, pink brush – I used cold tone of pink, because I think it suit best for her.

Change blending mode of this layer to Soft Light.
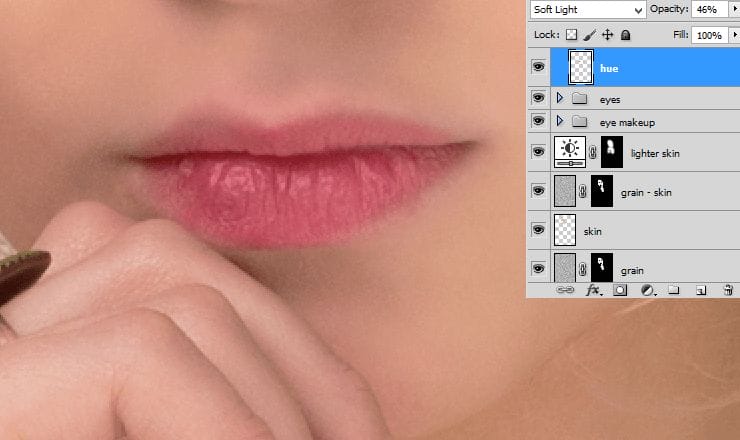
Step 31
To give full lightning of her lips, add new layer and with soft, white brush draw strokes of light.

If you like this effect, you can leave, but I changed blending mode of this layer to Hard Light.

Step 32
Now you should make facial features harder. Add new layer. Pick soft, big brush, with dark-beige (#ac7d79) color. Fill edges of her face, add some strokes on eyelid.

Now change blending mode to Multiply – it will naturally fill her face. Decrease opacity to 51%.
Step 33
You’ll make hair! In retouch is really important to increase the volume of hair. You can use simply strokes from Photoshop presets (1-2px), or you can find brushes to make hairs.
Hair brushes:
- Hair brushes – kuschelirmel-stock
- Hair brushes smudge usage – texturized

At first, you should make a darker base of hair.
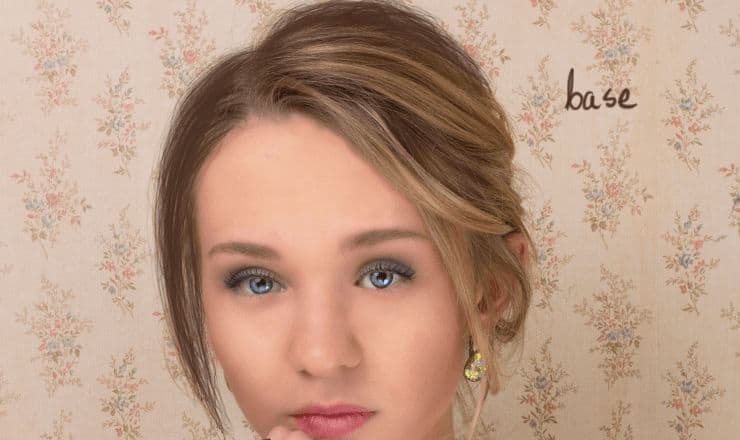
Then, you should draw highlights on hair.
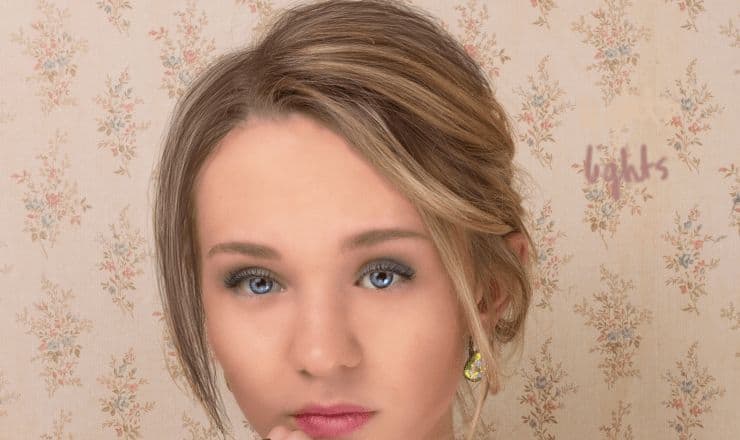
At the end, you should add neutral color of hair – to great blending.
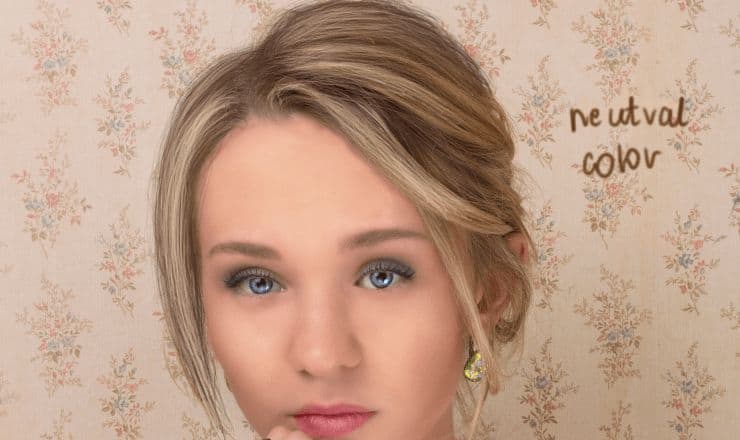
Step 34
Add new layer. Pick soft, big brush, and set #9faf36 color. Draw dots on earring and necklace. It will add spectacular light from gems.
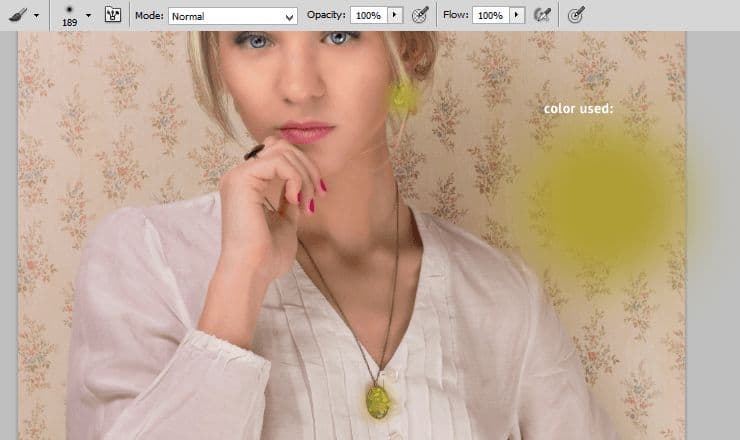
Change blending mode to Soft light, decrease opacity to 50%.

Step 35
Add adjustment layer with brightness/contrast.
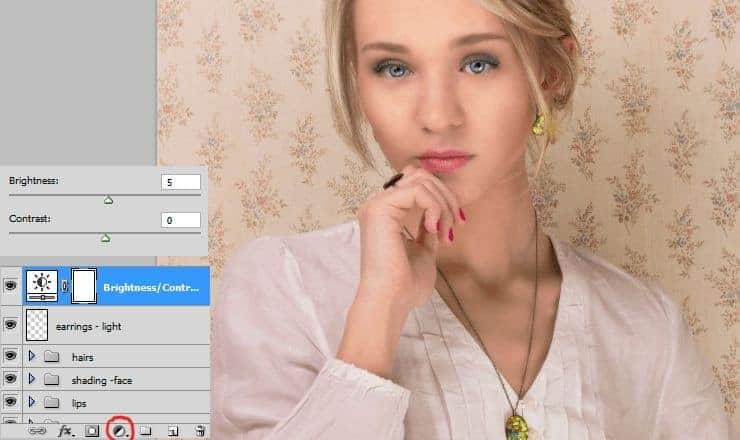
Step 36
Now decrease saturation, by adding adjustment layer with Hue/Saturation.

Step 37
Now you’ll make contrast bigger by adjustment layer with Brightness/Contrast.

Step 38
Optional, but really nice – add adjustment layer with color balance.

Step 39
At the end create new layer. Choose Sharpen tool and draw on the edges of her face, on her hair, on her nose, lips and eyes. Model will be more realistic and eye-catching. It’s very important to do this at the end – otherwise you can make colours and sharpen ugly.

Final Results

![final-results[1] final-results[1]](http://www.photoshoptutorials.ws/wp-content/uploads/2014/07/492x740xfinalresults11.jpg.pagespeed.ic.QPuJfhML80.webp)
 RSS Feed
 Twitter
 12:54 PM
 Unknown
 Posted in
0 comments:
Post a Comment
sksumon